SFX Power User Tips and Tricks
Tip #1:
Stereo or Mono .wav file?
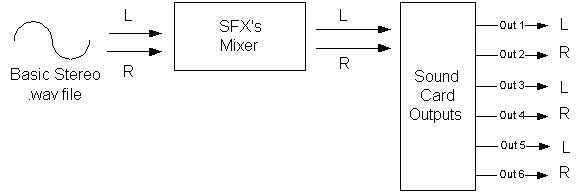
One thing that I find it’s important to keep track of when working with SFX: the limitations of the Direct Sound API. (the audio engine behind SFX) One of these limitations is when playing back a typical stereo .wav file, the left channel of the .wav file can only be routed to the odd numbered outputs of the sound card, and the right channel of the .wav file can only be routed to the even numbered outputs of the sound card. (see diagram below)
While most of the time, this is perfectly acceptable, and in many cases, is what would be done with your basic CD playback as well, eventually you’re likely to run into a production where it would be really useful to route them separately. One easy way around this is to feed your SFX sound card outputs into a tradition hardware mixer and let it handle some of the routing outside of SFX. But another solution might simply be to just create a mono .wav file (or single channel .wav file). If the program material doesn’t really need to be stereo, many times this can be a smooth solution. (see below)
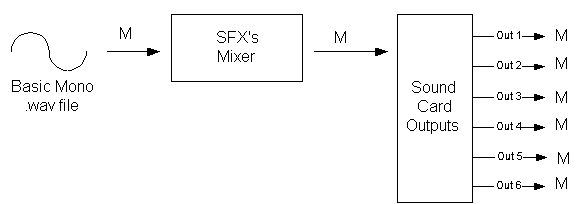
With the mono .wav file playback, that single channel will then get distributed to both the odd and even numbered outputs on the sound card.
Splitting the Stereo Fader
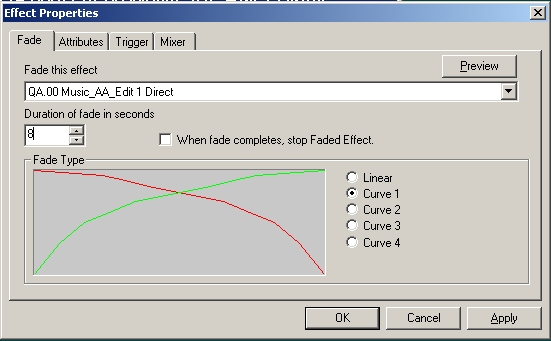
Ever need to be able to pan or move your audio between a single left and right output pair in SFX? If you have, you’ve probably noticed that it can be a challenge to make that transition sound perfectly smooth. Well, the real trick on those kinds of fades is to have a separate fade time for the fade out of one channel and the fade up of the other.
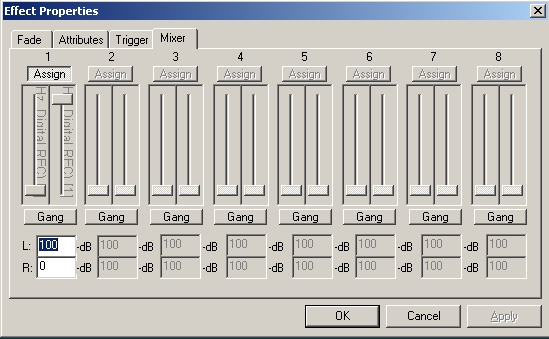
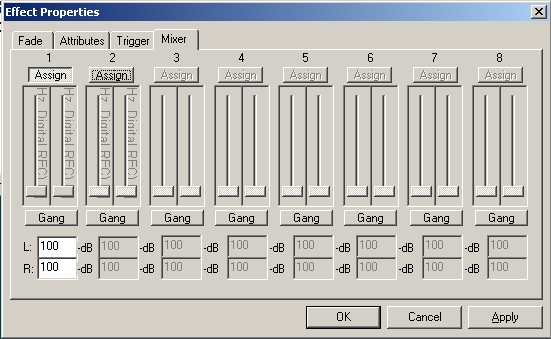
Then you might set your initial
.wav file playback mixer window like this:
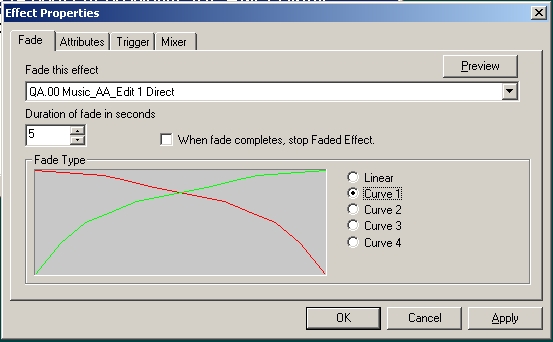
Then create a standard fade cue
like this:
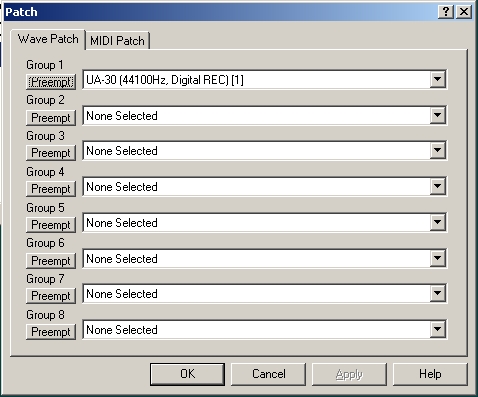
However there is a fairly easy work-around solution to this problem. All you need to do is to assign group #2 to the same physical sound card output, as group #1.
Here is how you can make
this work:
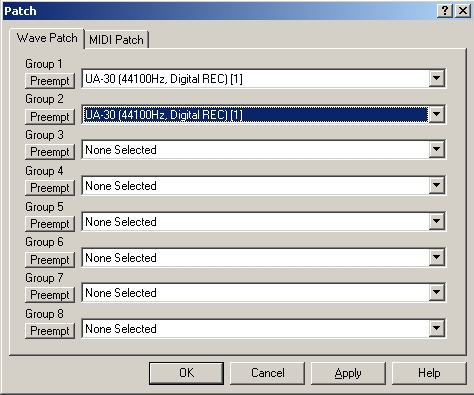
Change your Wave Devices Patch
to look like this:
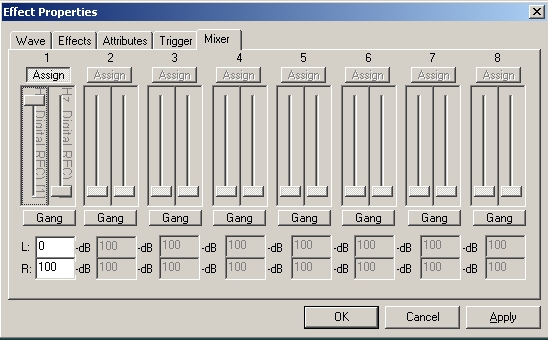
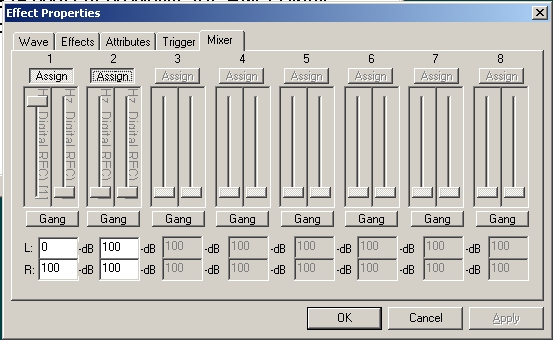
Set up your .wav file playback
cue’s mixer window like this:
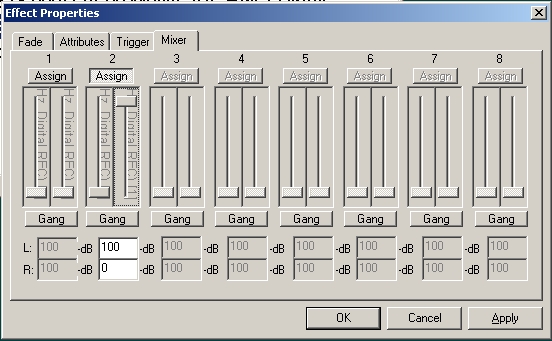
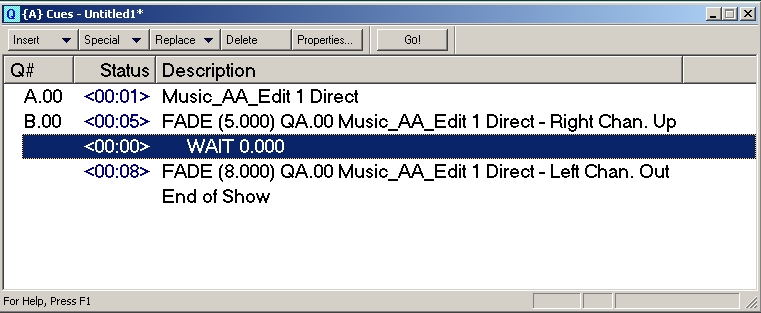
Now create a second fade cue,
with a slower (or longer) fade time to fade out the left output on group #1:
By then joining the two separate fade cues together with a wait command (time of 0.0 seconds), the fade up of the right output will occur at the same time as the fade out of the left output, but while having a separate fade time for the left and right outputs. You should end up with a much smoother sounding crossfade/pan using this method. As with any cue, you’ll probably find that you need to tweak some of the fade times (or the time of the wait cue, linking the two fade cues) to get the crossfade to sound just right. The above example is simplified (a bit), in order to keep the explanation short. But it presents all the basic steps needed. Some cues may require a more complex series of fades (two separate fade cues for the fade up and two separate fade out cues for the fade out) to provide the desired result.
Well, that ends the first issue of Tips and Tricks; I hope that you find this article useful.
Richard B.
Ingraham
Freelance Sound
Design/Engineer/Technician
RBI Computers &
Audio
http://www.rbicompaudio.20m.com